


Setting Up Your All-in-One Computer: All You Need to Know

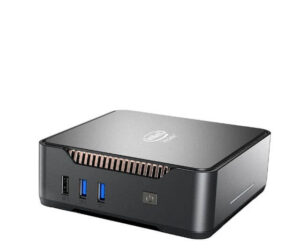
The best decision that you can make about getting a new computer would be to get an all In One computer. According to statistics in 2023, over 68 million desktops are forecast to be shipped worldwide. You can be assured that some of those will be All-In-One computers due to the attractive advantages that they give you, which makes it impossible to ignore. Once you decide on the exact All-In-One computer you need, be it a LENOVO, HP, DELL, APPLE iMAC, or the less popular options such as MSI you will need to set it up.
Setting up your brand-new all-in-one computer doesn’t have to be daunting. When the All-In-One PC computer is on the desk with all the cables spread out, you will need to get it up and running safely and quickly. Due to the build of the All-In-One, it compares to a laptop in sleekness with an aim of ensuring the end user gets something unique and memorable.
To ensure you configure the device to get all you need, this guide will walk you through the entire process, from unboxing to powering up, and everything in between. By the end, you’ll have your sleek all-in-one computer up and running smoothly.
How to set up your All-In-One Computer
Step 1: Unboxing Your All-in-One Computer:
Upon receiving your all-in-one computer, carefully unbox it. Make sure you have all the included components: the computer unit, power cord, keyboard, mouse, and any other accessories.
Step 2: Finding the Right Spot:
Choose a suitable location for your all-in-one computer. Ensure it’s placed on a stable and clean surface. Keep it away from direct sunlight or heat sources to prevent overheating. Use a computer workstation that will ensure it is safe and you will be comfortable.
Step 3: Connecting the Power:
Plug in the provided power cord to the back of your all-in-one computer and a power outlet. Turn on the computer using the power button.
Step 4: Initial Setup:
Follow the on-screen instructions to configure your computer’s language, region, and other preferences. You might also need to connect to a Wi-Fi network during this step.
Step 5: Keyboard and Mouse Setup:
Connect the keyboard and mouse to available USB ports on your all-in-one computer. Most modern all-in-one computers use wireless peripherals, so they might need batteries and a small setup process.
Step 6: Account Setup:
You’ll be prompted to create or log in to your user account. This is essential for personalizing your computer and accessing your files and settings.
Step 7: Windows/Mac Setup:
Depending on your computer’s operating system (Windows or macOS), you’ll need to go through additional setup steps. This might involve signing in with your Microsoft or Apple ID, choosing privacy settings, and more.
Step 8: Installing Essential Software:
Your all-in-one computer likely comes with some pre-installed software, but you might need to install additional programs like web browsers, productivity apps, or media players. The app store, Google Play Store, or official websites are good places to find and install software.
Step 9: Data Transfer (Optional):
If you’re transitioning from an old computer, you can transfer your files, photos, and documents to your new all-in-one computer. You can use an external hard drive, cloud storage, or a transfer cable for this purpose.
Back up your data: Before transferring your data, it’s important to back up your files to ensure that you don’t lose any important data during the transfer process. You can use an external hard drive or cloud storage to back up your data.
Connect the devices: If you’re using an external hard drive or transfer cable, connect the devices to both the old and new computers. If you’re using cloud storage, make sure you have access to the same account on both computers.
Transfer your data: Depending on the transfer method you’ve chosen, you can transfer your data by copying and pasting files, using a backup and restore tool, or using a transfer cable. Follow the instructions provided by the transfer method you’ve chosen.
Install essential software: Once you’ve transferred your data to the new computer, install essential software, such as an antivirus program, web browser, and productivity software.
Step 10: Personalization:
Customize your computer by setting your desktop background, screen saver, and other visual preferences. You can also organize your icons and arrange your desktop to suit your workflow.
Here are some ways to personalize your all-in-one desktop:
Change the desktop background: You can choose a desktop background from one of your personal photos or from the pre-installed options on your computer. To do this, right-click anywhere on the desktop, select Personalize from the drop-down menu, and then choose the Background option
Adjust the font size: If you have difficulty seeing the text on your computer, you can increase the font size. Increasing the font size will also increase the size of icons and other items on your desktop. To adjust the font size, go to the Personalization settings and select the Display option
Customize the Start menu: You can customize the Start menu by adding or removing tiles, resizing tiles, and organizing them into groups. To do this, right-click on a tile and select the appropriate option
Use custom paint and decals: If you want to personalize the physical appearance of your all-in-one desktop, you can use custom paint and decals. Some companies, such as AVADirect, offer custom all-in-one computers that can be customized to your preferences
Add accessories: You can add accessories to your all-in-one desktop to personalize it further. For example, you can add a colorful keyboard or mouse, a webcam, or external speakers
Step 11: Staying Secure:
Ensure that your all-in-one computer is protected by enabling special features. To stay secure once you set up a new All-In-One PC, here are some tips based on the search results:
Secure your home network: Before connecting your new computer to the internet, ensure that your home network is secure. Set up a strong password for your Wi-Fi network and consider enabling network encryption protocols like WPA2
Use a firewall: Enable the built-in firewall on your computer to protect against unauthorized access. This helps monitor and control incoming and outgoing network traffic
Keep your software up to date: Regularly update your operating system, applications, and antivirus software. Software updates often include security patches that address vulnerabilities and protect against emerging threats
Use antivirus software: Install reputable antivirus software and keep it up to date. Antivirus software helps detect and remove malware, protecting your computer from potential threats
Use strong and unique passwords: Create strong and unique passwords for your computer, online accounts, and applications. Consider using a password manager to securely store and manage your passwords
Be cautious of suspicious emails and websites: Be wary of phishing emails and avoid clicking on suspicious links or downloading attachments from unknown sources. Verify the legitimacy of websites before entering personal information
Use a secure internet connection: When connecting to the internet, especially on public Wi-Fi networks, use a secure Virtual Private Network (VPN) to encrypt your internet traffic and protect your data
Back up your data: Regularly back up your important files and data to an external hard drive, cloud storage, or another secure location. This ensures that your data is protected in case of hardware failure or other issues
Lock your computer when not in use: When you’re away from your computer, lock the screen or log out to prevent unauthorized access. Locking your computer prevents unauthorized use, protects confidential information, maintains privacy and prevents data theft.
Dispose of old devices securely: When disposing of old computers or storage devices, ensure that all personal data is securely erased to prevent unauthorized access. You can use a recycling company that will recycle and dispose of computer waste.
Conclusion
Setting up your all-in-one computer is simpler than it seems. By following these steps, you’ll have your computer ready for work, entertainment, gaming, or whatever you have planned. Don’t hesitate to explore and experiment with your new computer to make the most of its features!
Remember, everyone starts somewhere, and setting up a computer is a great opportunity to learn about technology. Enjoy your new all-in-one computer! You can get your All-In-One PC here at marginseye.com and practice the set-up steps to completion.